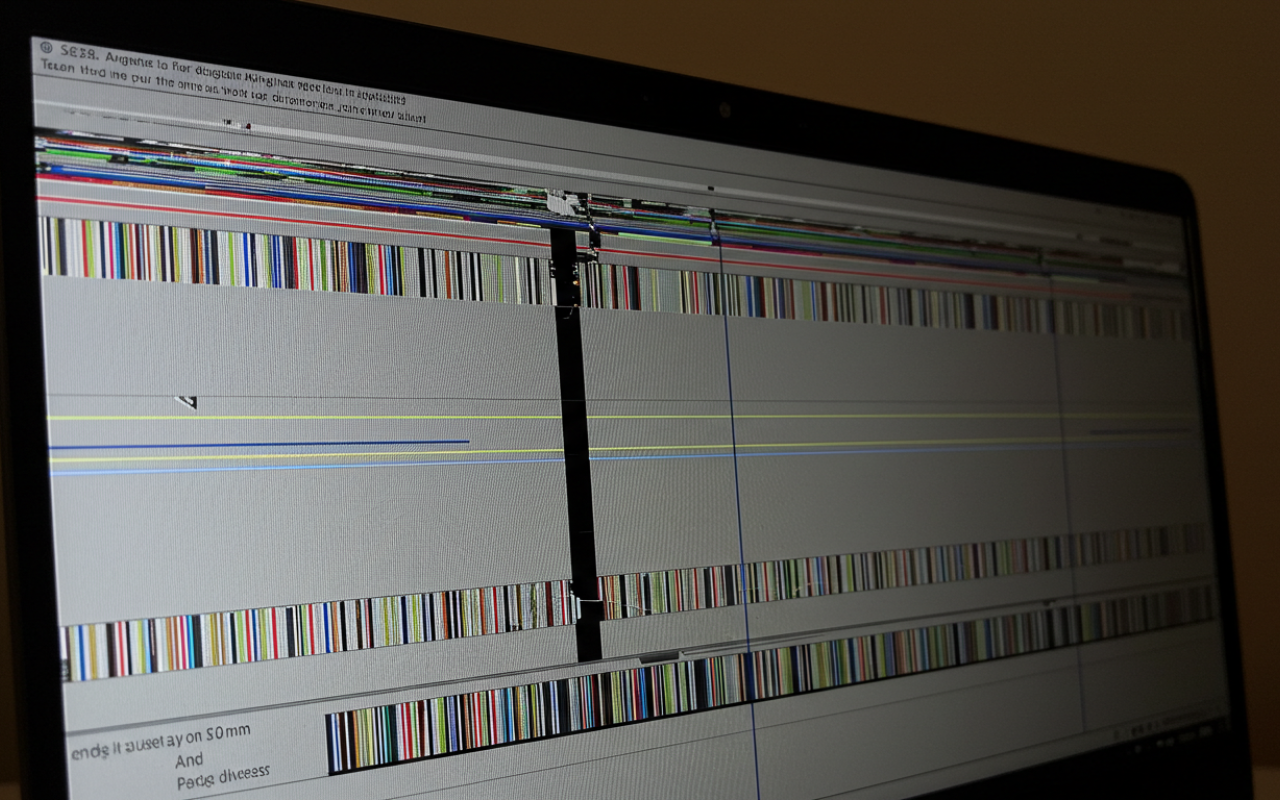
Laptop screen lines are among the most frustrating visual glitches that can appear on your device. These horizontal or vertical lines—flickering or static—can interfere with your productivity, strain your eyes, and often signal underlying hardware or software issues. If you’ve recently noticed lines on your laptop screen, don’t panic. In many cases, the problem can be resolved with some troubleshooting steps. In this blog post, we’ll guide you through possible causes and how to fix them.
Understanding the Cause of Screen Lines

Before diving into the repair process, it’s essential to understand why screen lines appear in the first place. Typically, these lines are due to one of the following reasons:
- Loose or Damaged Display Cable: The cable connecting your laptop’s motherboard to the screen might be loose or damaged.
- Graphics Card Issues: A malfunctioning GPU (graphics processing unit) can send improper signals to your screen.
- Screen Damage: Physical damage to the LCD can manifest as lines, discolouration, or flickering.
- Driver Conflicts: Corrupt or outdated display drivers can cause screen rendering problems.
- System Overheating: Excessive heat may affect GPU performance, leading to screen artifacts like lines.
Identifying the source of the problem will make it easier to apply the correct fix.
WE PROVIDE LAPTOP SERVICING. CHECK OUT OUR SERVICES
Step 1: Restart Your Laptop

It might sound simple, but restarting your laptop is the first step. Temporary glitches or software conflicts can often be resolved with a reboot. If the lines disappear after restarting, it may be temporary. However, if they persist, continue with the following steps.
Step 2: Check for External Display Output
To determine whether the problem is with your screen or the internal graphics technology, connect your laptop to an external monitor or TV using an HDMI or VGA connection.
- If the lines appear on the laptop screen and the external display, the issue likely lies with the graphics card or motherboard.
- If the lines only appear on the laptop screen but not on the external display, it’s probably a screen or cable issue.
This is a key diagnostic step to help you determine the best repair path.
Step 3: Update or Reinstall Graphics Drivers
Outdated or corrupted drivers frequently cause screen-related issues. To upgrade your display driver:
- Choose Device Manager by performing a right-click on the Start menu.
- Expand the Display Adapters section.
- To update your graphics card’s driver, right-click on it and choose Update.
- Choose Search automatically for updated driver software.
If the lines persist, uninstall the driver and restart your computer. Windows will automatically reinstall the default driver, which may solve the issue.
Step 4: Boot into Safe Mode
Safe Mode runs Windows with minimal drivers and services. If the lines disappear in Safe Mode, it likely confirms that the problem is software-related.
To boot into Safe Mode:
- Type msconfig and press Enter after pressing Windows + R.
- Go to the Boot tab.
- Check Safe Boot and select Minimal.
- Click OK and restart your laptop.
If the lines are not visible in Safe Mode, try rolling back your drivers or restoring your system to a previous point.
WE PROVIDE LAPTOP SCREEN REPAIRS. CHECK OUT OUR SERVICES


Step 5: Perform a Physical Inspection
Carefully inspect your screen and surrounding components:
- To see if pressure impacts the lines, lightly press around the screen’s edges.
- Open and close the laptop lid to see if the position changes the display. This might point to a loose or damaged ribbon cable if it does.
- Check for any visible LCD cracks, spots, or pressure damage.
If you’re comfortable with the hardware, disassemble the bezel and inspect the screen’s connector cable. However, proceed only if you’re confident. Otherwise, seek professional help.
Step 6: Consider Replacing the Screen
If all software troubleshooting has failed and physical inspection confirms screen damage, you might need to replace the LCD. The screen replacement cost depends on the laptop model, but in many cases, it’s a straightforward fix for a technician.
For example, if you’re dealing with a specific brand like ASUS, you should explore our Asus Laptop Screen Repair service. We have specialized tools and replacement parts for various models, ensuring a seamless repair.
When to Call a Professional
If the issue lies deeper—like a failing GPU or motherboard—DIY fixes may not be enough. Attempting complex repairs without the proper expertise can result in further damage or even data loss. We can help with that.
We at City Laptop Repairs have the know-how and resources to identify and resolve any screen problem. Whether it’s a hardware fault, display cable, or software glitch, we can provide a comprehensive solution, often on the same day. Don’t let screen lines interrupt your workflow—let us handle the problem for you with minimal downtime.
WE PROVIDE LAPTOP SOCKET CHARGING REPAIR.
Preventing Future Display Issues
Regular care and maintenance can lower the chance of troubles, even though specific screen problems are inevitable.
Here are a few tips:
- To keep your laptop from overheating, use a cooling pad.
- Update your drivers to prevent software problems.
- Handle your laptop carefully, especially when opening and closing the lid.
- Avoid pressure on the screen, like pressing it or placing objects on your laptop
- Use battery-saving features wisely, but ask yourself, Does Battery Saver Damage Your Laptop Battery? Knowing the answer can help extend the life of your device while avoiding unintended consequences.
Your Next Steps Toward a Clear Display
Screen lines on a laptop can be caused by various factors—from minor software glitches to serious hardware failures. The key is to diagnose the issue methodically, starting with simple steps like rebooting and updating drivers and moving on to more complex inspections if needed.
If you’re unsure or uncomfortable taking your laptop apart, it’s best to consult professionals. We recommend getting regular laptop servicing to catch issues early and extend the life of your device. Screen lines, boot issues, and battery deterioration can all be avoided with preventive maintenance.
Got a problem you can’t solve? Trust us at City Laptop Repairs to bring your laptop back to life—quickly, affordably, and professionally.